PDXpert PLM Software
Install Guide
Moving your PDXpert PLM database and file library
Last update 2022-10-12
- Introduction
- How PDXpert stores your data, license key, and files
- Determining your system's file library location and size
- Moving a "small" system
- Moving a "large" system
- Validating your moved database & library
- Converting the source system to a test server
- Uninstalling the source server
- Related topics
You may want to move PDXpert data to a different computer when you change the operating system or SQL Server edition (from, say, Express to Standard edition, or from SQL 2014 to SQL 2019), or convert from a single-user to multi-user system, or copy production data into a test server.
In this topic, the source computer contains existing database and library files that are copied to the target computer. The target may be a new production server computer or an existing development, test or user training system.
Your target computer's SQL Server version must be equal to, or later than, thesource system's SQL Server. For example, if the source server uses SQL Server 2019, then the target server must have SQL Server 2019 or later; it cannot have SQL Server 2014 or SQL Server 2016. Before running the PDXpert installer on the target server computer, you may need tomanually install the compatible SQL Server release.
Similarly, the target server's PDXpert release must be the same as, or later than, the source system's PDXpert release.
Before beginning: Use the PDXpert client tocheck that the source system uses the most recent software license key. The PDXpert release installed onthe target system must be compatible with the software license.
Do not use SQL Server commands to attach database MDF/LDF files copied from another PDXpert system; this can damage your data. To ensure client cache coherence, each database must have a unique database identifier ([PDXpertInfo].[DatabaseId]). The PDXpert Server assigns a new identifier when it the restores the database; the SQL Server ATTACH command does not.
The PDXpert database stores information about documents, parts and change forms. The database also contains the collection members; administrator-defined operating rules; and system-managed "housekeeping" data. The software license key and user account configurations are also saved in the database.
Files that have been attached to these items are stored within a separate Library folder, with references to these files stored in the database. A library file is simply a copy of the original file, renamed to ensure uniqueness.
Other system data, such as the search index, is also stored outside the system database but this data is recreated on demand, and therefore will not be moved.
If your company has made changes to the source computer's PDXpert.Service.exe.configfile, the settings may need to be copied into the target server computer'sPDXpert.Service.exe.config file.
The PDXpert Application Server console on your source server computer displays the location of your database and library. Open the PDXpert Application Server console and, on the Managetab, note the location shown to the right of the Change Data Directory button. This is the current location of the Datafolder.

To determine your system's size, open your source server computer's File Explorer, and navigate to the Datafolder.
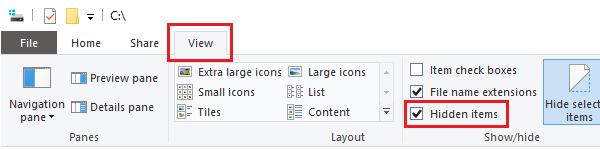
Windows normally hides the ProgramData folder. If the data directory is C:\ProgramData\PDXpert\Data then you may need to view hidden items in File Explorer.
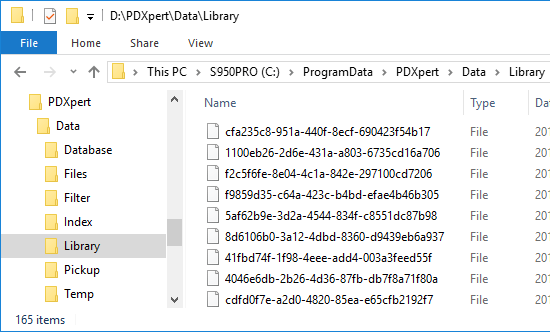
Within the Data folder are several subfolders. We need to move only these two:
Note the size of the files contained in the \Database subfolder.
Check the values of the files contained in the \Library subfolder. Right-click on this \Library folder, select Properties from the context menu, and note the Size or Size on disk properties.
This procedure describes how to move your PDXpert data when you have a combined database and library of less than 2GB.
Ensure that all users are logged out of their client workstations.
Check that the email queue is empty. If it is not empty, wait until it's empty, or click theDelete all button. This prevents any unexpected emails to be sent when the database is restored to the new server.
On the source server computer, back up your database using the default type Database with Library (*.pdxz). Note the name and location of the saved backup .pdxz file.
If the backup dialog doesn't let you save the backup as a PDXZ file, but only as a BAK file, then follow the instructions for moving a large system in the next section.
On the target server computer, install your PDXpert Application Server software. Use thedefault install procedure or theadvanced install procedure.
The target server's SQL Server version must be compatible with your database from the source server.
The target server's PDXpert release must be the same as, or later than, the source server.
Copy the backup .pdxz file from the source server computer onto alocal drive on the target server. Do not restore the database from a mapped network drive. The restore operation may fail.
Use the PDXpert Application Server console on the target server computer torestore the database.
After installation, review the PDXpert Application Server post-installation checklist.
To send workflow and task notifications, your SMTP server must accept emails from the new server machine. For configuration information, see the Setting up the email account help topic.
You're now ready to validate the moved database and library.
When you have a large database and/or library (more than about 2 GiB), then you'll move the PDXpert database and the library folder separately.
Ensure that all users are logged out of their client workstations.
Check that the email queue is empty. If it is not empty, wait until it's empty, or click theDelete all button. This prevents any unexpected emails to be sent when the database is restored to the new server.
On the source server computer, back up your databaseusing the optional type Database without Library (*.bak). Note the name and location of the saved backup .bak file.
On the target server computer, install your PDXpert Application Server software. Use thedefault install procedure or theadvanced install procedure.
The target server's SQL Server version must be compatible with your database from the source server.
The target server's PDXpert release must be the same as, or later than, the source server.
Use Windows Explorer to copy the library files from the source server computer \Libraryfolder (a) across the network directly to your target server computer \Libraryfolder, or (b) to a backup disk or USB drive and then onto the target server computer. Each server computer's \Libraryfolder will be located within the server data folder as describedabove.
Copy the library files beforerestoring the database backup file. The library files' hash values may need to be recalculated, which requires the physical files.
Copy the backup .bak file from the source server computer onto alocal drive on the target server.
Do not attempt to restore the database across the network from a mapped drive. The restore operation will fail.
Use the PDXpert Application Server console on the target server computer torestore the database.
Do not use SQL Server Management Studio or SQL Server commands to restore the database. The PDXpert Server must assign a new identifier when it the restores the database.
After installation, review the PDXpert Application Server post-installation checklist.
To send workflow and task notifications, your SMTP server must accept emails from the new server machine. For configuration information, see the Setting up the email account help topic.
Use the following steps to confirm that your database and library file pointers have been successfully moved.
If your company has made changes to the source computer's PDXpert.Service.exe.configfile, review these to decide if any settings should be copied into the target server computer'sPDXpert.Service.exe.config file. The settings may need to be adjusted for the new environment. See thePDXpert service configuration settingstopic.
The software license key and user log-in accounts are stored in the database, and moved to the new server when the database is copied.
Start the PDXpert client using an account with sufficient role permissions:
Enter account name, password, and target server computer's name or IP address.
Open the Options, and mark the Reset my account settings option.
The user must always mark Reset my account settingsoption when moving between the source and target servers. Or, the database unique identifier must be changed using a SQL query. See the following section Converting the source system to a test server.
Click the OK button.
If you're prompted for a license file, import the current license key file.
If you've moved a large system, open the Index Status window:Tools ➔ Index Status... command. Click the Re-index button. A large database may require significant time before all items are searchable.
If you've moved a small system, re-indexing automatically begins after the database is restored. You can check the indexing progress using the Index Status window.
Use the Item Explorer to search for a known part or document that has a file attachment; or, select a similar item from the Recent list. Open the item and confirm that the file attachment can be copied from PDXpert to your computer's Desktop. View the file to ensure the file appears as expected. You may want to test both recent and older items.
Check that email notices are received as expected.
After the new system has been verified, the source system can be uninstalled (see thenext section).
However, if you want to use the source for report development, import testing, upgrade verification, user training, or other purpose, see Managing a PDXpert test server.
A test system's database must be adjusted before it can be used alongside the production system. The production database can be damaged if you don't correctly configure the test system.
After the target system has been verified as working correctly, uninstall the PDXpert Application Server from the source server machine. This ensures that
- no one mistakenly connects to the obsolete database, and
- all system components remain compatible — the target server can update a PDXpert client, but it cannot update another server.
If you wish, you can then install other PDXpert clients to connect to the target server.
On each client log-in window, remember to use the target server's name.